Articles in this topic
Pages
Add, rename, sort and delete the pages of your website, and learn what is special about the home page and a Booking page. On a party website: private pages and the login page.
7 min read
Your website can have one page or several — for example Home, Menu, Gallery, Contact and Reservations. Every page appears in the menu bar at the top of your website automatically, in the same order as your page list.
Your pages
Click the Pages tab — the first icon in the side panel.
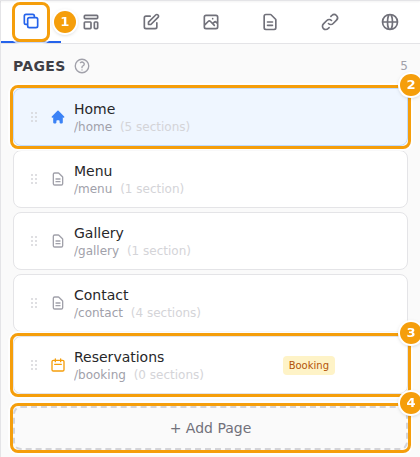
For each page you see its name, its web address (for example /menu) and how many sections it has. Two kinds of pages have their own icon:
- the house — your home page (see The home page);
- the calendar with the Booking label — a Booking page (see The booking page).
On a party or event website there are more marks: a key with the Login page label is the login page, a small lock with Signed in means the page is for signed-in guests only, and a door with Not signed in means only visitors who are not signed in see it. See Private pages and the login page.
Click a page to open it: the preview shows it, and the Sections tab shows its sections.
You can also switch pages at the top of the editor: click the name of the page you are on and choose another one. On a wide screen you see a tab for each page there instead.

Add a page
-
In the Pages tab, click + Add Page.
-
Type the Page Title — the name guests see in the menu bar, for example Private Dining. The web address (Slug) is filled in for you: /private-dining.
-
Choose the Page Type:
- Default — a normal page that you build with sections.
- Booking — a page that shows your booking form.
-
Click Create.
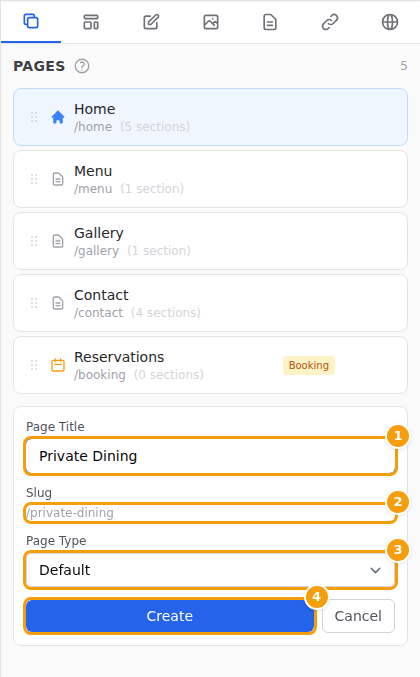
Page Title (1), the web address (2), Page Type (3) and Create (4) -
The new page opens, and it is already in the menu bar of the preview. It is still empty: click + Add Section to fill it. See Add a section.
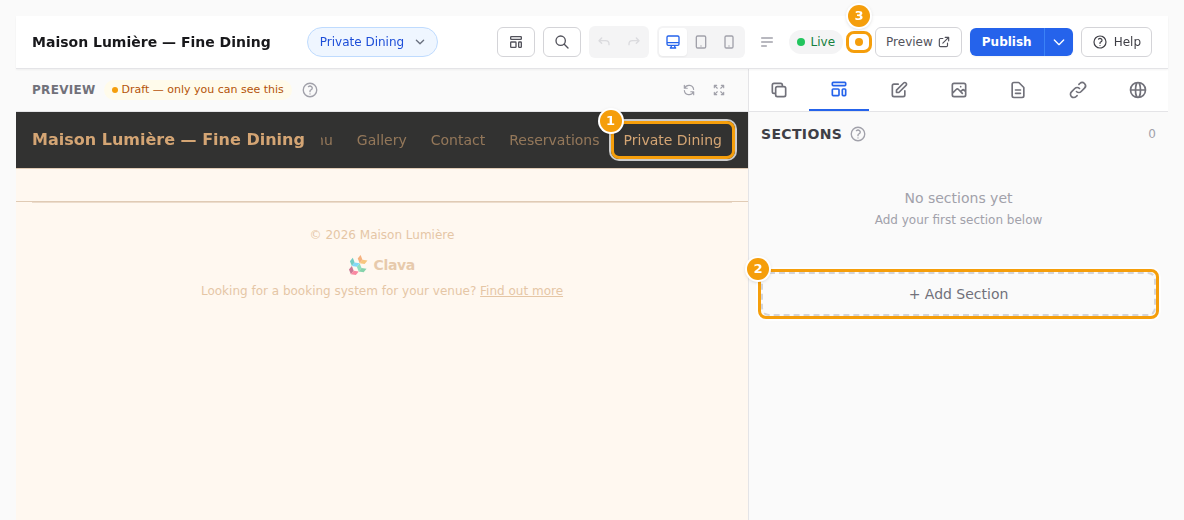
The new page in the menu bar of the preview (1), Add Section (2), and the orange dot (3): not published yet
Tip
Your events? Above the title, choose Start with: Events page creates a page with a list of your events, and Single event adds a link to one event to your menu bar — it creates no page; the link is listed under your pages, in Menu links to events. Every event opens on its own event website. See An Events page and A link to one event in your menu.
Tip
Letters such as č, ć, š, ž, đ or ä, ö, ü, ß? The web address only uses the letters a to z, numbers and dashes, so the editor leaves other letters out: Über uns becomes /ber-uns. Check the address below the title before you click Create. If it looks wrong, create the page anyway and then correct its Page Slug — for example to /ueber-uns. See Rename a page or change its web address.
Tip
More than one language? The title you type here is used for every language of your website. To give the page its own name in each language, open its Page details afterwards and fill in the language tabs.
Good to know
A new page is part of your draft: guests see it only after you publish. When you publish, the editor first lists the new pages that will go online, so you can check them before you confirm.
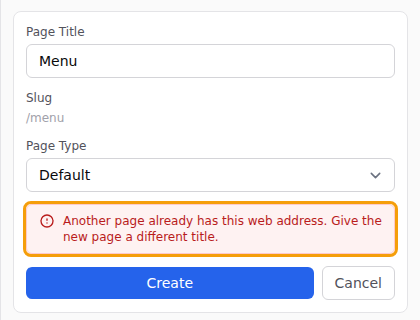
If the page can't be added, a red message below the form tells you why — for example that another page already has this web address, or that you have no internet connection. Change the title, or check your connection, and click Create again.
Rename a page or change its web address
-
In the Pages tab, rest your mouse on the page. Two small buttons appear on the right. Click the gear (Page details).

Page details (1) and Delete page (2) appear when you point at a page -
The Page tab opens with the settings of this page:
- Page Title — the name of the page in your menu bar. Use the language tabs (EN, HR …) to give it a name in each language of your website.
- Page Slug — the last part of the page's web address, for example menu. Use only small letters a to z, numbers and dashes (-): no spaces, and no letters such as č or ü.
- SEO Title and SEO Description — the title and the short text that search engines such as Google show for this page. You can leave them empty.
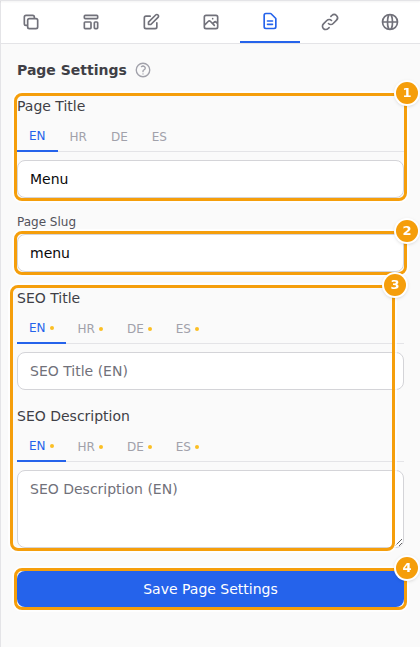
Page Title (1), Page Slug (2), the search engine texts (3) and Save Page Settings (4) -
Click Save Page Settings. The preview shows the new name.
Important
Page settings are not saved automatically. Click Save Page Settings before you move on. If you forget, the editor reminds you when you try to publish: Save your Page Settings changes first.
Careful
Changing the Page Slug changes the page's web address. Links to the old address — for example in an email, on a flyer or on social media — stop working once you publish. Only change it when you really need to.
Change the order of pages
The order of your page list is the order of the menu bar on your website.
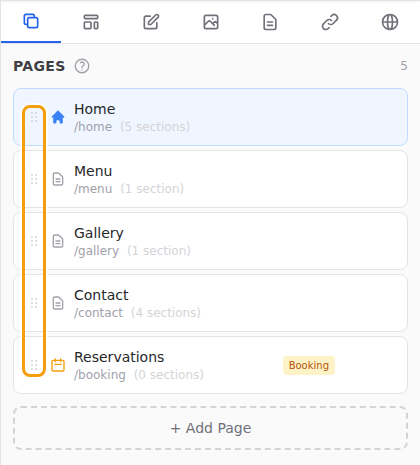
- In the Pages tab, point at the dotted handle on the left of a page.
- Hold the mouse button down and drag the page up or down.
- Let go where you want the page to be. The new order is saved to your draft.
Tip
To see the new order in the menu bar of the preview, click the round arrow above the preview (Refresh preview).
The home page
The page with the house icon is your home page: the page guests see first when they open your website.
- It can't be deleted.
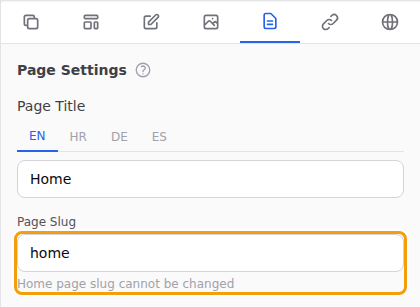
- Its web address can't be changed — the editor shows Home page slug cannot be changed.
- Everything else you can change: its title, its sections, its texts and photos.
- On a party or event website the home page has the same three Visibility choices as any page, and a setting for where guests start after signing in. See Who sees a page or a section.
Tip
You can't make another page the home page. To change what guests see first, change the sections of your home page. See Sections.
The booking page
A page with the page type Booking — a Booking page — shows your booking form, the same form guests use to reserve a table, with the menu bar and footer of your website around it. In the page list it has a calendar icon and the Booking label.
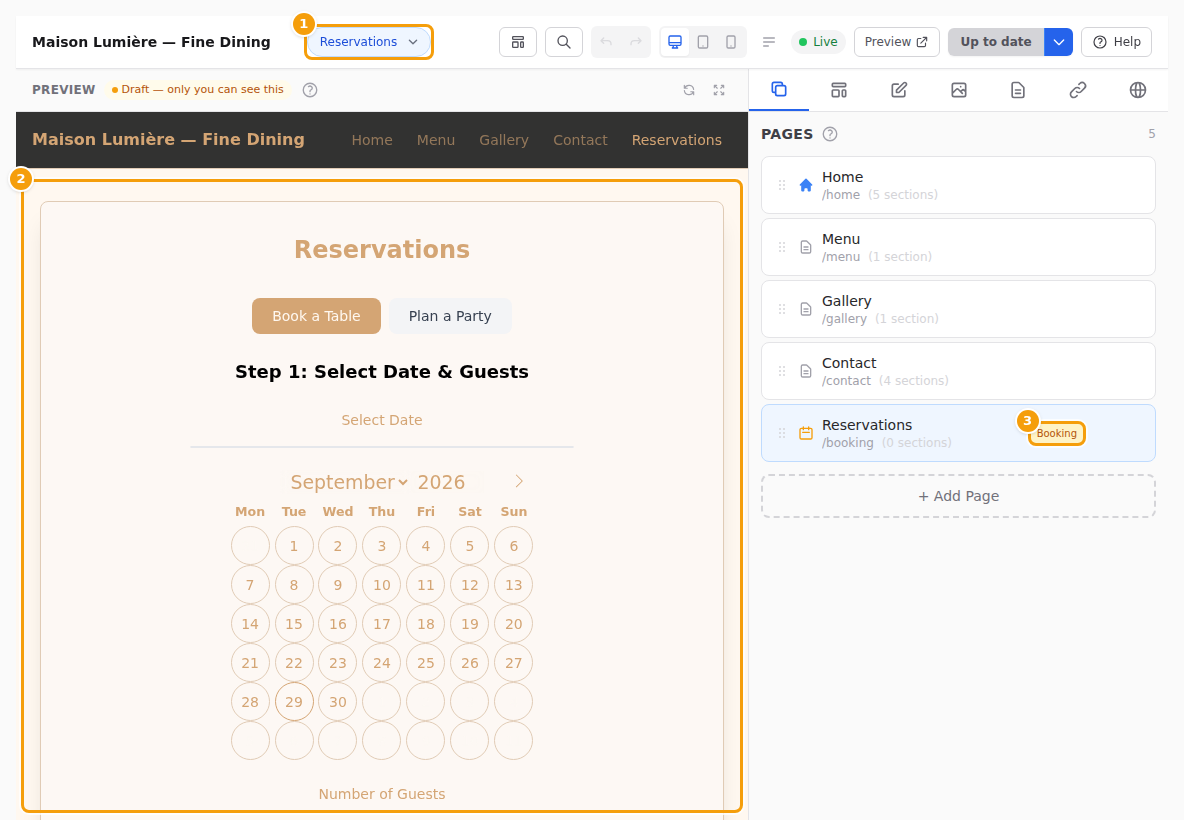
- The booking form works on its own: you don't need to add sections to a Booking page. Its Page Title is shown above the form.
- Want a designed page? Add sections as on any other page, for example a Hero, opening hours or questions and answers. They show on the Booking page, and the form stays under the Page Title, below an opening Hero. To put the form somewhere else, add a Booking section where you want it: the page then shows that form instead.
- Guests who open the booking address you share (emails, QR codes, booking link buttons) land on this page. Without a Booking page they land on the first page with a Booking section (a page that shows the form itself comes before one that only has a button that opens it, the Modal Popup and Sticky Bar designs), and without one on your standard booking page, so the address always shows a booking form.
- The form takes its colours from your website's design. After you change your colours, publish so the form matches too. See Colours and fonts.
- Want a booking button on your other pages as well? Add a Booking or Booking CTA section. See Add a section. A booking button on the page that holds the form scrolls down to the form instead of reloading the page; on any other page it opens the page with the form.
Good to know
A Booking page is part of your website. It is not the same as the standard booking page, which guests see only while your whole website is hidden. See What the website editor does.
Ready-made pages for a party website
Party and event websites only.
Under Start with in the + Add Page form, next to Empty page and Login page, are ready-made pages with sections already on them. Change the texts, add your pictures, and delete what you do not need:
- Welcome — the page for visitors: a welcome, the countdown and the sign-in, and quick links for guests.
- Our story — your story and a few pictures.
- The day — the programme, the menu and what is good to know.
- Location — how to get there: the venue, parking and directions (see Places and directions).
- Accommodation — places to stay nearby, with booking links.
- Gifts — a note about gifts and your gift list.
- Photos, Guestbook, Your table and The evening — pages of the guest features, below.
- Memories — thank your guests and show the day in pictures.
Each one is named in every language of your website and has its own web address (for example /our-story). Except Welcome, they start for signed-in guests only; you can change that under Visibility before you click Create. You can type your own title; the page is then named in that title only.
Pages of the guest features. Photos (guests add and share their photos, see Guest photo sharing), Guestbook (see Guestbook), Your table (see Your table) and The evening (the table and the guestbook on one page) work only when your venue offers the feature. Until then the page is greyed out, with a button Ask my venue to offer this for your event. These pages are for signed-in guests or everyone, never only for visitors who are not signed in, because the guests would not reach them.
Private pages and the login page
Party and event websites only — restaurant and location websites don't have this.
Every page of a party or event website has a Visibility: Everyone, Signed-in guests only or Only visitors who are not signed in. See Who sees a page or a section for all three. A page for signed-in guests only has a small lock in the page list, a page for visitors who are not signed in a small door. A closed party starts with its new pages for signed-in guests.
Make a page private
- In the Pages tab, rest your mouse on the page and click the gear (Page details).
- Under Visibility, choose Signed-in guests only.
- Click Save Page Settings, then publish.
This works for every page, the home page included. To make the whole website private, set every page except the home page to Signed-in guests only and keep the home page limited to the names, the date, the countdown and the sign-in — or set the home page to Signed-in guests only too, and everybody else sees the login page.
A single section can be private too: open it in the Editor tab and choose its Visibility.
Who is a signed-in guest? A person on the party's guest list who has signed in: with the link in their invitation e-mail, with a link the couple sent, or after asking for a sign-in link on the website — they enter their e-mail address and get an e-mail with a link.
What other visitors see. A visitor who is not signed in and opens a page for guests sees the website's login page instead — at the same address. After they sign in, they land on the page they wanted. Pages for guests are left out of the menu for them.
Design the login page. A website has at most one login page.
- In the Pages tab, click + Add Page.
- Under Start with, choose Login page. It is greyed out once the website has one.
- Click Create.
You can also click Design the login page in the settings of a page for signed-in guests. The button is under Visibility, as long as the website has no login page.
The new page is called Sign in and has the address /login. Design it like any page: add sections, images and texts. Its sign-in form is the Guest sign-in section, in two designs: Centered Card and Form Beside Image. You can change its heading, its text, the label of its button and a Help text shown under the form. If you remove the form, the editor adds it again at the end of the page, so the login page always works.
- The login page is never in the menu, it is always visible to everyone, and it can't be the home page.
- Without a login page, your website uses a standard sign-in form in its own look, and the Guest login button in the menu opens it in a small window. With a login page, the button opens the login page instead.
- Applying a starter template keeps your login page. See Start from a template.
Important
Publish after you change a page's visibility or the login page: visitors only see the published version. See Publish your changes.
Hide a page
There is no switch to hide a single page: every page of your website is in the menu bar. Instead you can:
- hide part of a page — hide one or more of its sections. See Hide or show a section;
- make the page private (party and event websites) — set its Visibility to Signed-in guests only. See Private pages and the login page;
- remove the page — delete it (see below) and publish;
- hide the whole website — guests then see the standard booking page. See Hide your website.
Important
When you publish, everything in your draft goes online together — including pages you are still working on. The publish window lists the new pages, so you can click Cancel if one isn't ready yet.
Delete a page
-
In the Pages tab, rest your mouse on the page and click the red bin (Delete page).
-
The editor asks Delete Page and reminds you that all sections on the page are removed too. Click Delete, or Cancel to keep the page.
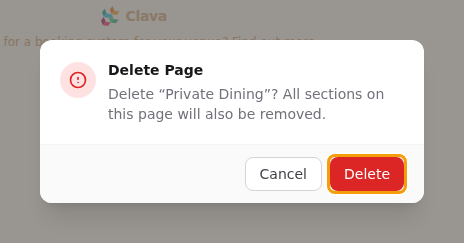
Confirm with Delete -
The page disappears from your draft. It stays on your live website until you publish — the publish window then lists it under the pages that will be removed.
Careful
The undo arrows in the toolbar can't bring back a deleted page. Deleted one by mistake? If you haven't published yet, the page is still in your live version: open that version in the editor. Your current draft is saved in the history first, so nothing is lost. See Open a version in the editor.
One page or several
Depending on your plan, your website can have several pages or just one. If your plan includes one page only, clicking Create shows the red message Adding more pages requires an upgrade. Your home page can still hold all the sections your plan includes — to list your events, for example, add an Event Programme section to it. See One-page websites.
Related
- Sections — fill your pages
- Menu and footer links — add extra links, for example to your online shop
- Publish your changes
- Versions